Device List
Page Overview
Section titled “Page Overview”The Device List is the core workspace for managing all enterprise vehicles and smart terminals. This page supports multi-dimensional view switching, flexible field configuration, and quick group management to help dispatchers quickly locate target devices. It also provides rich device-level actions (such as profile editing, threshold configuration, and location sharing), with deep linkage to the map view on the right.
Entry Path
Section titled “Entry Path”Monitoring Center > Device List
Page Features
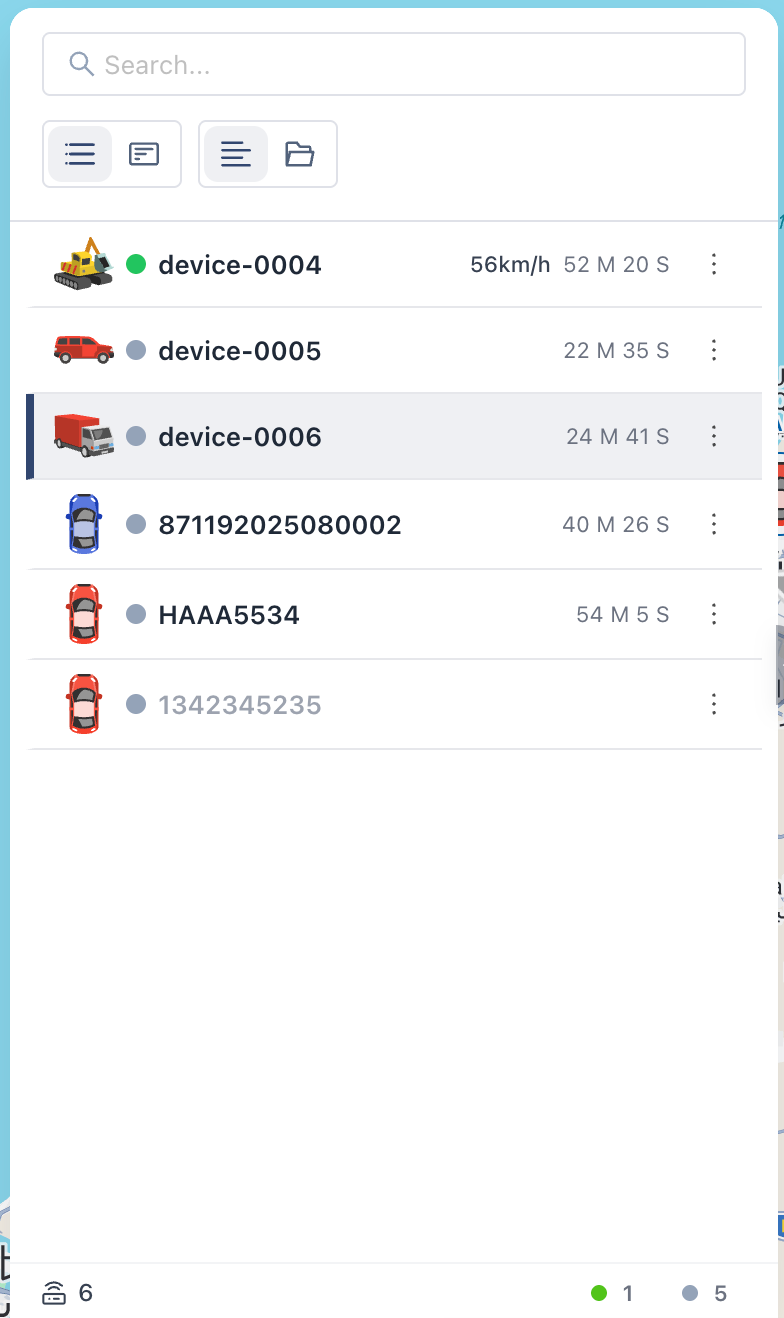
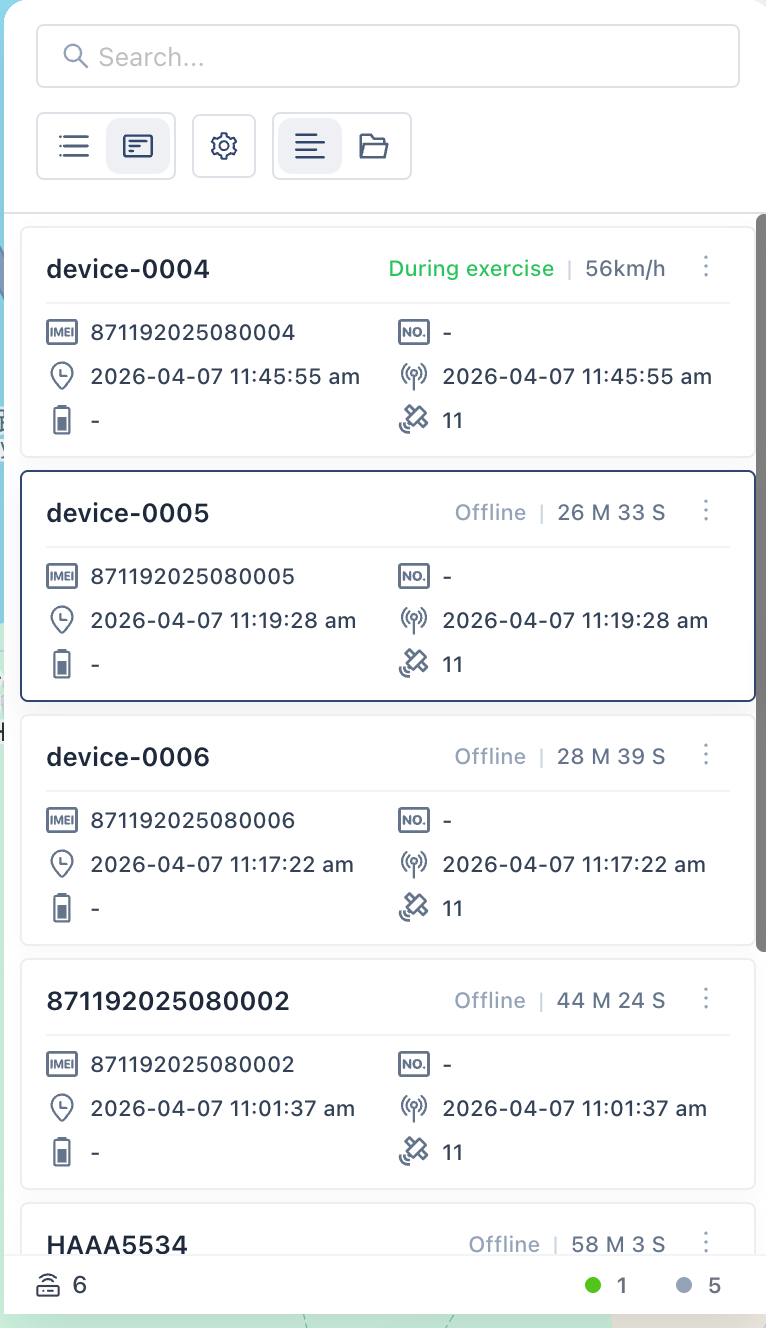
Section titled “Page Features”Search and Status Filters
Section titled “Search and Status Filters”Supports quick fuzzy search by device name or other identifiers, and precise filtering by the bottom status bar (online, offline, moving, stationary, etc.) to quickly locate target devices.
Map View Linkage
Section titled “Map View Linkage”Click any device in the list, and the map on the right automatically pans and zooms to center that device at an optimal view, enabling seamless list-to-map interaction.
Display Mode Switch (Simple/Detailed Cards)
Section titled “Display Mode Switch (Simple/Detailed Cards)”Two UI layouts are available for different business scenarios:
- Simple list mode: A compact table/list layout that displays more devices per screen. It focuses on key monitoring indicators such as status icons, real-scene images, current speed, and status duration.
- Detailed card mode: Presents richer device details in card format. Click Configuration next to mode switch, then select custom fields and reorder them by drag-and-drop based on business needs.
View Mode Switch and Group Management
Section titled “View Mode Switch and Group Management”Supports two asset presentation dimensions: Flat List and Organization Grouping.
- List View: Directly shows all devices that match current filters.
- Group View: Shows devices in a tree by enterprise-defined groups (for example, fleet, branch, or region).
- Create Group: After switching to Group View, click Add Group on the right to create a new level.
- Transfer Group: In a device’s More menu, choose Transfer Group to quickly move it to another group.
Device More Functions (Quick Action Menu)
Section titled “Device More Functions (Quick Action Menu)”Click More in a device action column to open the management menu:
- Edit Device Information: Opens the profile editor to complete or modify business attributes (for example, device name, plate number, VIN, SIM number, responsible contact, email, and vehicle image).
- Send Command: Remotely sends specific control or query commands to the hardware terminal.
- Platform Alarm Configuration (Cloud Computation): Configure per-device cloud-triggered alarm rules and thresholds, including:
- Geofence alarm configuration
- Overspeed threshold setting
- Stop overtime threshold setting
- Offline overtime threshold setting
- Engine ignition/shutdown state toggle
- Business Module Shortcuts: Quick entries for Trip, Alarm, and Track. Clicking them auto-selects the device and opens the corresponding module panel.
- Share Location: Generates an external tracking link for real-time location. After setting validity duration, share the link with external customers or collaborators to view device status without platform login.
- Alarm configuration logic: Alarms of the platform-computed type depend on cloud logic rather than local device alarms. Ensure devices stay online and continue uploading location data for accurate triggering.
- Link security: Location-sharing links are public, password-free links during their validity period. Confirm recipient identity carefully to avoid sensitive logistics data leakage. Links expire automatically after the set duration.
Q: Why can’t I see “SIM Number” in some detailed cards? A: Card fields are user-configurable. Click Configuration in the top-right of card mode and check whether SIM Number is selected.
Q: How can I assign a batch of newly purchased devices to different branches? A: First create branch groups in Group View with Add Group. Then find each new device, click More > Transfer Group, and move it into the corresponding branch group.